One of the best lessons learnt when working in the WordPress space is that the use of child themes can really save your bacon. Particularly as you start building complex and highly customised websites.
I make a habit of installing child themes as part of my initial site build checklist, even if I don’t have plans to make use of the additional functionality straight away.
What is a child theme and why use one?
A child theme is a theme that links to a parent, in this case the Elementor Hello Theme. It’s made up of one or two control files, and provides a local repository for your theme additions or code changes.
The beauty of using a child theme is that it allows you to upgrade your parent theme, keeping it current and secure, while ensuring any extras you’ve added – css styling, javascript, header entries, etc – remain safe from being overwritten.
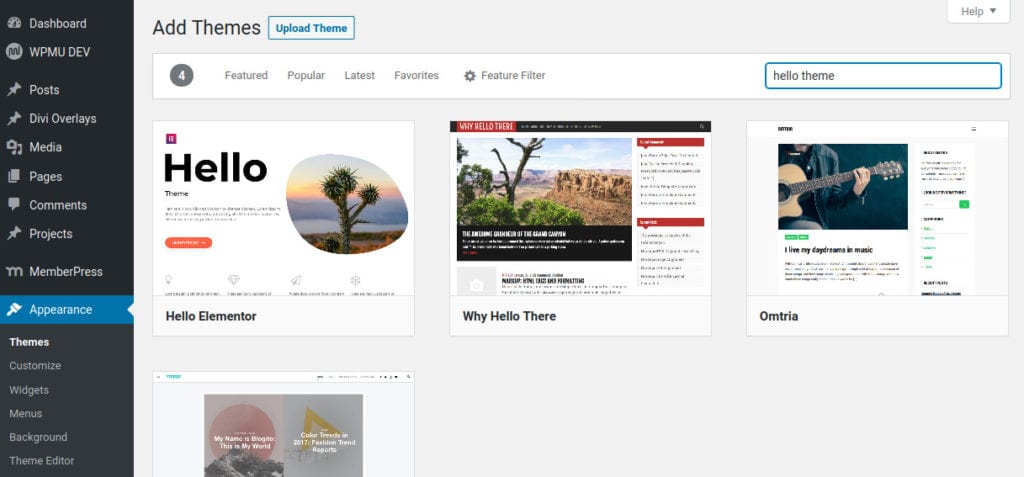
Installing the Parent Hello Theme

Installing the Child Hello Theme
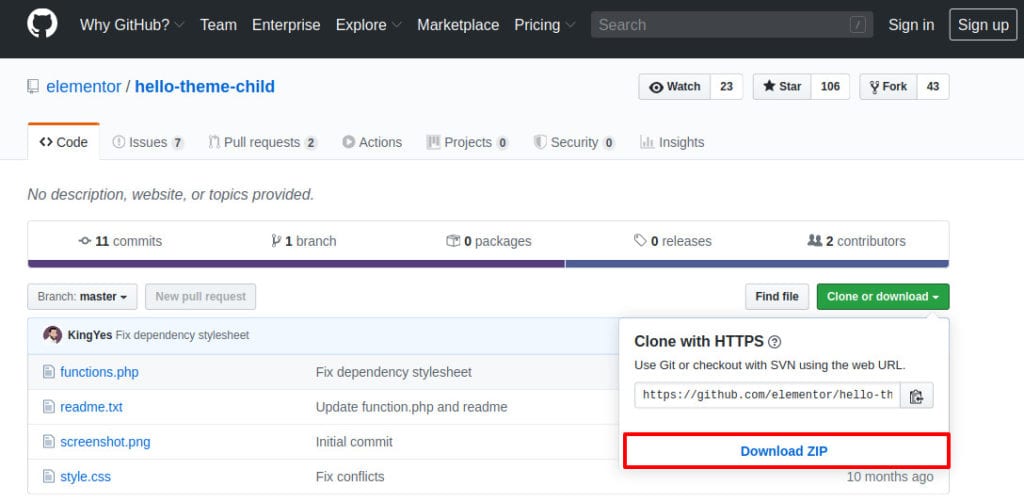
To install the Child Hello theme you’ll need to download the zip file from the Github repository. (Note the child theme is only made up of four files).

Once you have a copy of the theme, manually upload the theme to your WordPress instance. In the WordPress dashboard browse to Appearance – Themes and click the Upload Theme button.
Browse for the previously downloaded zip file and click Install Now.
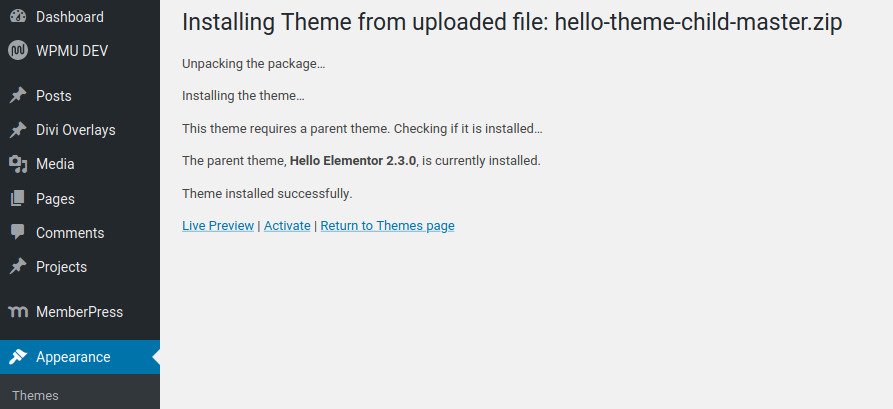
You’ll notice the installation checks for the presence of the parent theme.

How to use your new Child theme
So now we have two themes installed – the parent Hello theme, and the active Child Hello theme. At this point you’re good to start adding your own customisations.
You’ll note from earlier Github file listing that the child theme contains functions.php and style.css files. This is where you can add any additional javascript or css styling entries your site may require.
To use these files you can use one of two methods.
- Using the WordPress dashboard. Browse to Appearance – Theme Editor and make sure Hello Elementor Child is selected from the dropdown list. Here you can add your custom code to the file of your choice.
- Using the file browser from your site’s hosting cPanel/management environment.
I use Siteground hosting for all my client sites (they are brilliant!) and will demonstrate using their environment.
From the cPanel dashboard, select the File Manager

Once the file manager has opened you can then edit the file as needed.

If you need to make changes to a file not listed in the child theme – say for instance the footer.php file – you can simply copy the file from the parent folder into the child folder and make your changes.
Any files copied in this way will then be protected from being overwritten during future upgrades.
Final thoughts
I find using the file manager method more beneficial for two main reasons. The first is that I can backup a file easily before I begin making edits, and roll back to a previous version if I happen to break the site. I’ve found this has come in handy many times, especially when writing and adding Javascript.
The other reason is that I’ve built a library of functions and CSS styling over time. It’s very easy to upload one or two files into the child theme repository and have access to all that I’ve previously written.
Anyway, that’s it for this tip. Hope it helps.
Ciao
Ev


