I’ve been a fan of the Cloudflare suite for many years now and sit all my client sites behind their CDN. Their site security and optimisation products are second to none.
Siteground have been my go to hosting company for about 4 years. I moved my client sites across to them after a bad experience with another well known hosting company – read a 4 hour outage without communication or admission. Siteground have an excellent reseller model and their support team are brilliant. I’m planning on writing up a full review of my experiences in the coming weeks.
To the task at hand…
Why use a Cloudflare SSL certificate?
It’s true that Siteground offer a free Lets Encrypt SSL certificate for all websites. One of these certificates can be easily generated and assigned to a site using their cPanel interface. This certificate lasts for six months before it automatically renews for a further six months.
Unfortunately over the years, and with multiple hosting companies, I’ve had issues with this renewal process where thecertificate renewal/regeneration process fails. When this happens a site is left with an expired certificate and browser warnings start to appear for site visitors. Not a good look.
And on the off chance the expiration is not caught soon enough this can have a detrimental effect on SEO page rankings. Ack!
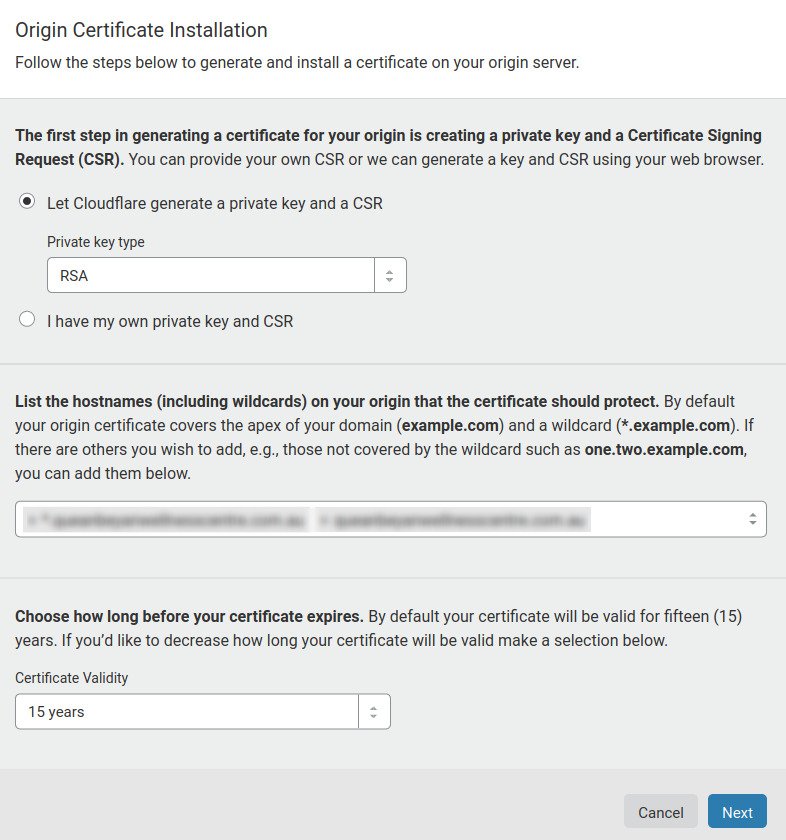
A Cloudflare origin certificate, on the other hand, is valid for 15 years and completely removes the headache of certificates expiring at the worst possible moment.
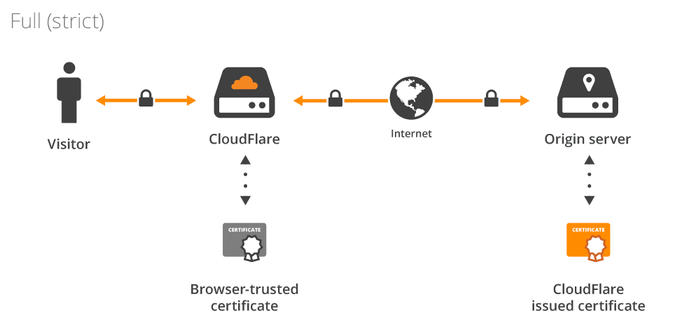
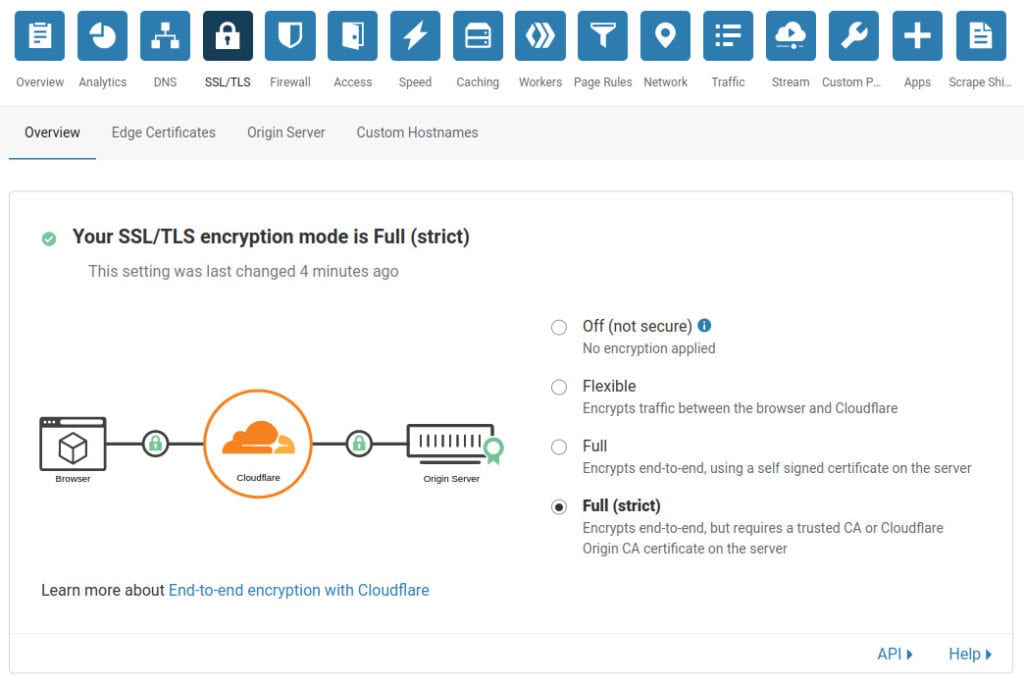
Additionally, Cloudflare SSL origin certificates makes it really easy to implement end to end encryption, ie from the client browser to your origin (hosting) server.
So, while it may add an extra step to the initial build process, I think it really does pay for itself over the long term.

Generating the Cloudflare origin certificate
I’ll assume you have a Cloudflare account set up with your domain added. You can sign up for a free account if you don’t already have one.
Head to SSL/TLS – Origin Server and click Create Certificate.

In the create certificate options, select Let Cloudflare generate a private key and a CSR and leave the private key type as RSA.
The wizard should pre-fill the current domain and wildcard domain for you (see diagram below), and leave the certificate validity to 15 years. Click Next.

Once generated, leave the key format as PEM and copy the Origin certificate and Private key to a text editor. You will need these for the next step.
Tip: I securely save and store these files just in case I need to re-import them at a later date.
Installing the new certificate into the Siteground cPanel
Open up the Siteground cPanel and jump into the SSL/TLS Manager section.

Select Manage SSL Websites and scroll down to Install an SSL Website.
Select your domain from the dropdown list and copy from your text editor:
- The Cloudflare Origin certificate to the Certificate (CRT) field
- And the Cloudflare private key into the Private Key (KEY) field
Leave the Certificate Authority bundle blank and deselect the Enable SNI for Mail Services checkbox.

Click Install Certificate
Once added, you can view the certificate details to confirm that it is indeed a Cloudflare Origin certificate.
Enabling Full (Strict) SSL mode in Cloudflare
Last step is to tell Cloudflare to use full (strict) SSL mode for your website. From the Cloudflare website – Full mode encrypts end-to-end, but requires a trusted CA or Cloudflare Origin CA certificate on the server.
In the Cloudflare management console browse to SSL/TLS – Overview and select the Full (strict) mode.

Wrapping up
And that’s it. You should be able to access any site hosted by Siteground using HTTPS knowing that it’s now encrypted throughout the entire journey.
And you won’t need to worry about your certificates expiring anytime soon.
Hope this helps.
Ciao
Ev